Enable the OAuth2 server_
Turn on the OAuth2 server on your Appwrite project and register the client app.
2 min read
Before writing any code, turn TaskFlow's project into an OAuth provider and register Vantage as a client.
Enable the server
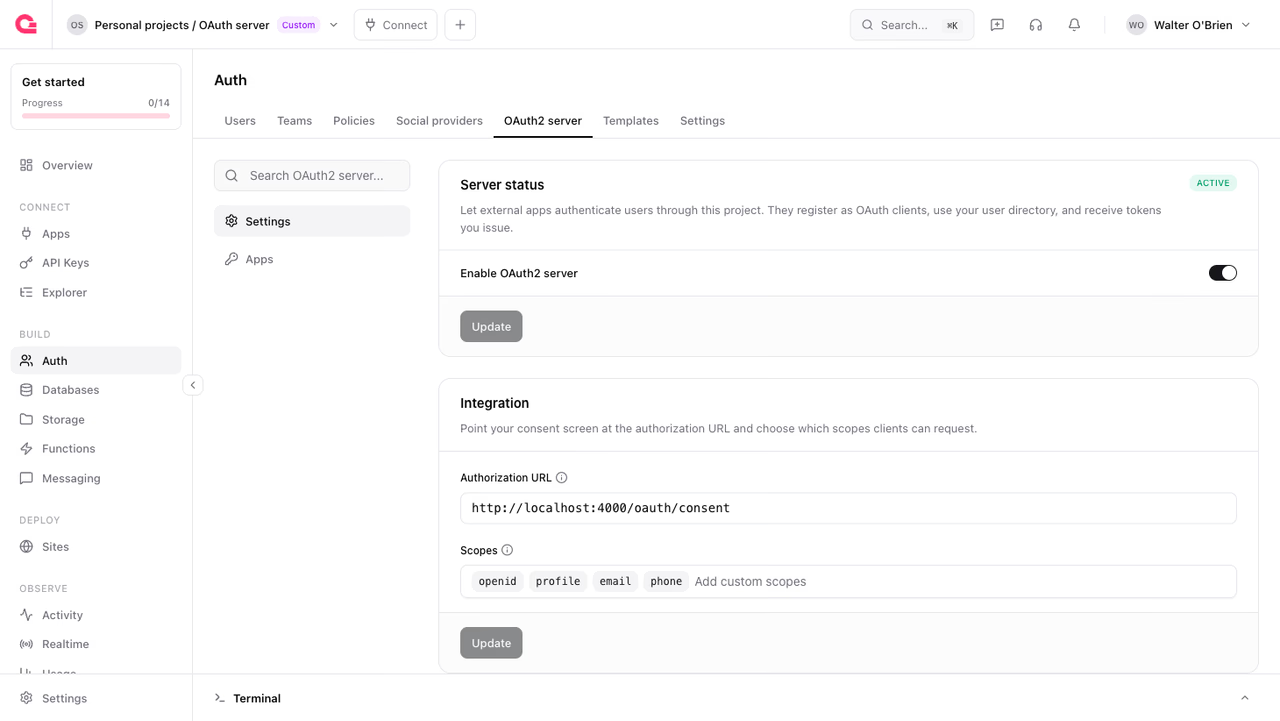
In the Console, open Auth, select the OAuth2 server tab, and turn on Enable OAuth2 server.
Set the Authorization URL to where TaskFlow will host its consent screen. In this tutorial that is http://localhost:4000/oauth/consent. This is where the OAuth2 server sends users to sign in and approve.
Leave the scopes at their defaults. openid, profile, email, and phone are always included, and Vantage only needs the first three. See Scopes to add your own later.
Register the client
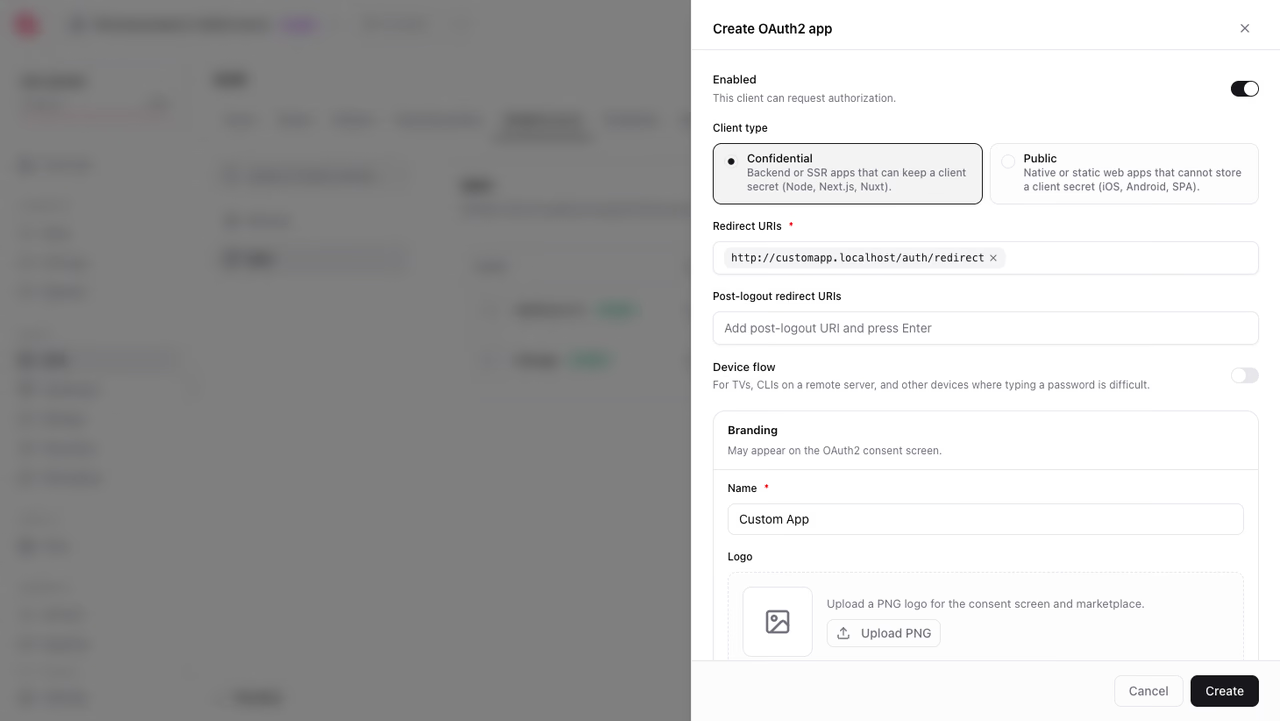
Open the Apps sub-tab and create a client for Vantage:
- Name:
Vantage. This appears on the consent screen. - Client type:
Confidential. Vantage has a server that can hold a secret. - Redirect URIs:
http://localhost:4100/oauth/callback. The OAuth2 server only returns codes to registered URIs.
When you create the client, copy the client secret. It is shown once. You will also need the client ID from the clients list.
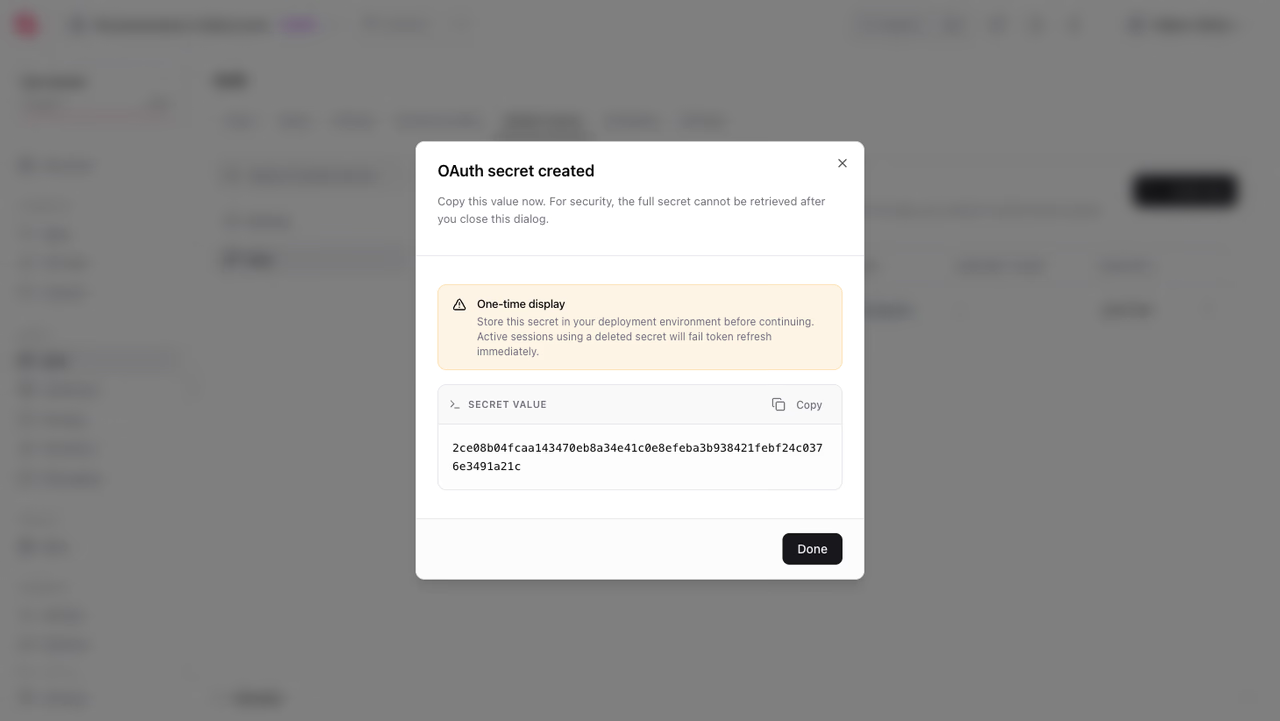
You now have everything the apps need to talk to the OAuth2 server: the client ID, the client secret, and your project ID. Keep them handy for the next step.
For the full set of client options and the SDK equivalents, see Clients.
Continue to scaffold the two apps.
Was this page helpful?
Share what worked or what we should fix. Once approved, our agents automatically apply suggested updates to the docs.